Spring-Cleaning: How to get it done in 7 days

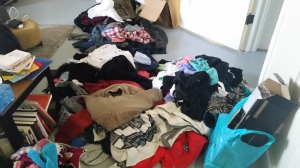
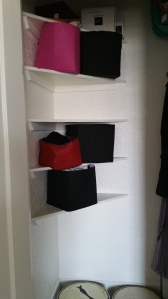
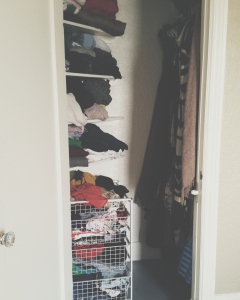
Hey there!  Sorry I’ve been MIA, but I broke my phone, took an impromptu trip to Vegas, and frankly, cleaning takes FOREVER.  When I initially started working on this post, I imagined that the entire project would only take a day, maybe two…(HA! In my dreams.)  I cleaned in sections one day at a time…(mostly because I tried to do so much on the first day that I wore myself out and didn’t want to finish it…I’m sure some of you understand.)  I started with my closet…(which ended up taking about five days to finish organizing)….on the first day I pulled out everything on the ground and figured out what was clean laundry and what was dirty…between my boyfriend and I…we had like nine loads of laundry to do…including towels, sheets, etc.  So, he did the first half of the laundry while I was at work and I did the second half of the laundry while he was at work…(if you don’t have someone to split laundry duty with…just split it up between two days.)  I suggest looking at laundry as time for you to work out…if you can do both at the same time, you’ll feel like one of the most productive human beings alive.  Don’t be afraid to move things around and try to organize your space differently.  I put things away and had to move them all during this process, but now everything just makes more sense.  (BTW, I used VSCO Cam for all of these pictures and for the filtered ones I used, T1 preset.)

Processed with VSCOcam

Processed with VSCOcam

Processed with VSCOcam

Processed with VSCOcam

20150517_162859

20150517_171147

Day One:

1. Clear your apartment of random clothing on the floors…(including in your closet)…on your chairs…tables…under your bed…(you get the picture)…gather up all of your clothing.

2.  Separate clothing that is clean from clothing that is dirty…but not into two piles…take the time to separate bright, whites and darks from one another in your dirty piles…and take the time to categorize your clean clothing into groups like socks, sweatpants, shorts, etc.  (This step will save you the most time overall.)

3.  Start your laundry.  (The smell of clean laundry in my apartment is motivation to get my clothing organized.)

4.  Gather up all of your loose hangers and decide what is hanging that can be folded or vice-versa…(depending on your storage space.)

5.  Take out anything in your closet that is not clothing and see what kind of space you’re really dealing with….(get storage boxes if possible.)

6. Sweep or vacuum your entire space.

20150519_121732

20150517_162926

Day Two:

1.  Finish your laundry…(so that you can actually give all of your clothing a home)…otherwise you will end up not leaving enough space for your clothes and you have to shove and wrinkle your clothes to put them away.

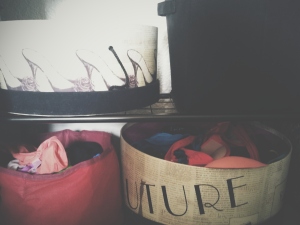
2.  Find a home for your smaller garments (socks, bathing suits, etc), that is easily accessible, but hidden.

3.  Utilize bins.  I use them for my smaller garments, and tank-tops, crop tops, etc. (small things that don’t wrinkle.)

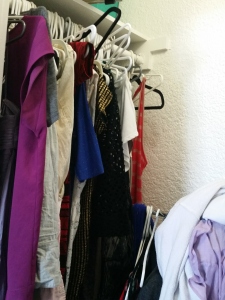
4.  Hang up your clothing in an organized fashion.  (Group together like garments, dresses, shirts, skirts, jackets, etc.)

5.  Make sure that you categorize your clothing in things that you can either wear together, things that you would wear to the same kind of event, or color-coordinated…that depends on preference.

I suggest if you’re lazy and hate putting together outfits, hang your pants with a top and jacket or a dress and cardigan with a small baggy that has matching jewelry…(like a matching gold set and a matching silver set that could match practically anything)…make as many options as possible so that you never have to worry about what you have to wear.  If you’re the kind of girl who just likes options, like myself, then I suggest hanging your clothes grouped together for different kinds of events.  For example: I put together all of my maxi dresses next to my rompers and beach cover-ups so that all of my summery options are together.  Then, I hung my formal dresses next to my party dresses and club dresses, so that my going-out options are all together.  And at the end of the rack, I hung all of the jackets and sweaters that I wear over those outfits…(a leather jacket, a jean jacket, every color cardigan, my pea-coat, my long sweaters…etc.)  On the other hand, you may just like to have your clothes color-coordinated, you could do that as well.

20150519_112815

Day Three:

1. Clean out your drawers and deal with all of the stuff you pulled out of your closet that wasn’t clothing.

2.  I put so much of my stuff in bins that I made extra drawer space for my boyfriend.  (you’d be surprised how many little shirts can fit inside a bin.)

3.  Re-organize your stuff.  (I went through boxes of stuff that my boyfriend and I had kept since we moved in…I kept all of the paperwork, pictures, receipts, etc. and put them in their own bins to go through on a later date…and then threw away everything else that we didn’t need.)

4.  I put together memory boxes of things from my life so that if I ever developed a memory loss, I could possibly remember my past more clearly…I’ve been collecting since I was in eighth grade, because I was inspired by my friend Michelle.  (it’s only a shoe box worth per year or two…I go through the boxes every once in a while and throw away things that I’ve already forgotten.)

5.  Take out your trash and recycling…you probably have a lot by now.

20150519_163923

Processed with VSCOcam with t1 preset

Processed with VSCOcam with t1 preset

Day 4:

1.  Gather all of your purses and bags together.

2.  Take everything out.  (Even if you’re the kind of girl or guy that leaves extra things in your bags so that you can be more prepared in the future.)

3.  Clean them all out and organize all of your extra stuff.

4.  Get yourself baggies, or use extra make up bags to put together kits for yourself that include hand lotion, hand sanitizer, lip moisturizer, a bag for the market…(if you live in LA, it will save you ten cents every time)…headphones, gum, a little candy or snack, a pencil or pen that can’t leak, girly things if you need them, and one of these amazing essential kits.  (I have two because I think they are so useful.)  If you do this, then you can make two or three and you can move those from one purse to another instead of leaving a bunch of stuff in each of your purses.

5. Scrub your bathroom, I mean clean the walls of your shower, the bathroom floor, scrub your toilet clean, the bathtub and wash the mirrors and bathroom sink.  It is a huge task, sometimes, and if it is too intimidating to do in one day, feel free to split it up one day at a time.

Day 4:

1.  Organize your work-out gear, sleep-wear…pretty much everything in your drawers.  Take it out, fold it, put away things you don’t need in bins and put them somewhere out of sight.

2.  Fold your sweaters and put them away.

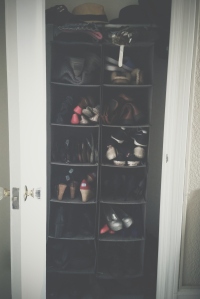
3.  Find somewhere to put your shoes that makes sense.

4. Do something with your hat collection.

5. Wash the dishes and scrub down your stove, microwave, oven, toaster-oven, and counters.

Processed with VSCOcam with t1 preset

Processed with VSCOcam with t1 preset

Day 5:

1. Take a break.  (You can do this on any day that you want.)

Day 6:

1.  Deal with your work attire, hang up all of your button downs, and things you can wear to the office on one side of your closet or in one section so you don’t have to pick from much when you have to go to work and store your iron and ironing board near by.  (Even if you don’t work in an office, you should probably still get some, you never know when you may need it.)

2.  Hang up your jackets and all the shirts that you don’t want wrinkled.

3.  Re-organize your movie collection…my boyfriend and I have compiled so many movies that we have two drawers and a CD book full of movies…and you should also try to find something new to do with all of your gaming accessories…my boyfriend and I play a lot of FIFA on Xbox, but he has other games and gaming consoles to store.

4.  Organize your take-out menu collection…put it in a binder or a drawer depending on how much space you have…obviously a binder is more organized.

5. Dust and sweep everything

Processed with VSCOcam with t1 preset

Processed with VSCOcam with t1 preset

Day 7:

1. Finish anything you haven’t completed.

2.  Make sure that you sweep/vacuum/Swiffer the floor.

3.  Take out the trash.

4.  Donate, give away, or sell the extra stuff you have and don’t need.

5.  Go through your refrigerator and make a list of healthier options than you currently have in it.  For example, if you drink regular milk, try getting almond milk next time, or if you eat ground beef, try getting ground turkey.  Also, if you use artificial sweeteners, I would like you to reconsider using regular sugar.  There are only sixteen calories in a spoonful of sugar…as long as you’re not drinking soda, which has 16 spoonfuls of sugar…it really isn’t that bad of an option when you look at the chemicals you’re consuming.

Spring cleaning doesn’t end at cleaning out your closet or scrubbing the shower or the floors, it ends with you working on cleaning out your surroundings and yourself.  Working on your mind, body and spirit will help you achieve your goals and face far less daily stress.

Here are the before and after photos in:

Processed with VSCOcam

Processed with VSCOcam with t1 preset

Processed with VSCOcam

Processed with VSCOcam with t1 preset

20150517_171147

Processed with VSCOcam with t1 preset

Tips to Spring-Cleaning:

1. Do a little bit at a time, but make sure to see it through.

2. You’re human, and things take time…we don’t all have the time to accomplish everything that we want in a day, but as long as we keep working towards a future goal we can accomplish it…(if this takes you a month…so be it, at least you did it…right?)

3. Throw away things you don’t need and shred your junk mail.

4. Transition your closet into your spring and summer attire.

5. Sometimes the scrubbing actually feels like a work out, but I still think you should try to work out as much as you can.

6. Stand or squat instead of sitting while you do everything.

7. Take the stairs when possible.

8. Add in yoga starting your first day, it will help relieve stress while you get through this.

9.  Start reading the labels on the food you eat.

This is how I did my spring-cleaning and got myself feeling brand new, how are you going to do it this year?  Are you going to start with eating right or exercising instead?  It’s all up to you.  I wish you all the luck in going out and doing it yourself.

With love,

BeccaJay

Hair-styling: How to get the blow dry bar look at home

When I was younger, I learned most of my hair tricks and tips from Seventeen Magazine, my mom and my sister.  As I got older, I learned more from my friends and my own experiences.  (Obviously, only some of the tips worked with/on my hair, but I tried the tips that didn’t work for me on my friends with different kinds of hair…and it worked for them.)  Over the years, I’ve had good hair days and bad hair days.  (Most of my bad hair days stemmed from me trying to do something new or different with my hair and it not working out.)  Here is a list of what not to do:

1. Don’t do something new/different with your hair the day of ANYTHING important.  (If you want to try something different with it, ALWAYS test it the night before.)

2. Don’t straighten all of your hair before you curl it.

3. Never curl the front part of your hair towards your face,  Make sure the clamp part of the curling iron is facing the mirror…and you rap the hair away from your face.  (To put it more simply…make sure the clamp is facing the mirror and turn your hand counter-clockwise on the left and clockwise on the right.)

4. Even though almost all girls look great with a professional blow out, most girls aren’t able to do a blow out on their own…so don’t be discouraged, you’re not the only one who can’t do it.  (In fact, I can’t even do it.)

I don’t have the time or the money to get blow outs regularly, (even though I would if I could).  In my experience, my blow outs never look like the ones I get after hair cuts.  So, I tried to give myself blow outs for a while (because people told me that I would eventually get the hang of it), but my hair is so thick and wavy (and curly at the root and bottom layers…but not the top…for some odd reason) that it rarely got straight enough before my arm felt like it was going to fall off.  (I wasn’t going to give up on trying to get the look though.)  In time, I found two magical tools and a better way to use another. 

1. The in-styler (bigger time saver for girls who have shorter/thinner hair.)  My friend Dora, who has an amazingly beautiful blog, told me about it.  She was the model from the infomercial, and is a former Miss Mexico.  She showed me how to use it and I was sold.  (It actually works.)  Check out her blog at http://www.doramolina.com…she’s seriously one of the sweetest girls that I have ever met…and her blog is incredible.  

2. A 2-inch barrel curling iron (bigger time saver for girls with longer/thicker hair.) I use Hot Tools curling irons.  

3. My straightening iron (because I can never get my hair completely straight, so I had to find a new purpose for it.)  I’ve had this Chi for at least six years, it was well worth the investment.


These tools help me to produce what I’m calling the “fake-out.”  Instead of blowing my hair out, I either blow it dry in a low bun or I let it air dry.  Then, I section it off into three parts and I make sure to part my hair the way it’s falling the best that day. Today I’m starting with a left part.  


Section 1 and 2 are the front sections. I section off the hair from the left side of my part down to the back of my ears then do the same on the right.  I gather the rest of the hair in the back and separate the bottom layer from the remaining hair and then I tie the remaining hair in a bun. When it comes down to the amount of hair per layer, it depends on how much time and/or hair you have.  (When I’m lazy and would rather sleep than get ready, I add more hair per layer.) 

After sectioning off your hair, use the straightening iron to staighten your roots. (If you have naturally straight hair, skip these steps, you want to let your roots keep their volume…also I suggest you blow dry your hair in a bun instead of letting it dry naturally. Also, if you are using the In-styler, you will still need to section your hair off you…will just ignore the straightening and curling bit.)  Begin with the left side, (STRONG SIDE…I love Remember the Titans…and Denzel) or the right side if you prefer. 


Take a small layer off the top and run the iron over the roots two or three times. Do this from bottom to top, one section at a time.  Then, go back through the entire process, but with the 2 in. curler.  (If you’re having one of those rare occasions where you actually feel like doing your hair.)  When I don’t have time for that (like today), I do them at the same time, (as in I take a piece of hair, straighten the root then curl it before I move to the next piece).  One thing I should mention, doing the front section at the beginning will help you to avoid looking too Shirley-Temple-esq, because the front pieces will have time to fall. Oh, and I if you’re feeling lazy (and if you have thick hair like me) doing the front first helps to ensure that the front looks prime for pictures when you’re going out.  If you’re short on time, you can be lazier about straightening or curling your middle layers, so that you can save your efforts for the front, top and bottom layers.  


A few tips:

1. Make sure your hair is completely dry unless you’re using the In-Styler…it  gives a more drying less dying type of effect. 

2. If your hair is thick and curly you can do it the night before and sleep with your hair in a bun. In the morning you can fix it up in ten minutes or less.  (When I say bun, I mean gather your hair at the nape of your neck, without brushing through your part, in the back and begin twisting it to the left or right and wrap it up in a low bun.)  

3. ALWAYS curl your hair away from your face.  

4. Get yourself a sleeve for your hot tools. I use Vera Bradley ones, but you can make them yourself out of inside-out oven mits if you don’t want to buy something new. 

Then, I flip my hair over and spray it with hair spray, (I finally started using it at 23 because my mom got me some for a photo shoot.  It is Pantene…there is a picture that includes it), as I toss my hair from side to side.  I do the same with my hair to the left and to the right.  (Don’t skip this step…it will help eliminate most of your fly aways, and give your hair body and volume.)

This is how I “fake-out” my hair instead of paying for a blow dry. I was inspired to make this post because I am sick and tired of watching videos and not being able to figure something out…and/or when I miss a step and I have to keep rewinding the video, especially when it is on my phone…I hope the pictures and descriptions will be more simple for you to reference.  I wish you all the luck in doing your first “fake-out,” let me know how it goes!

With love,

BeccaJay

Exercising: How to be “suns out, buns out” ready

Hey guys!  Checking in today with my younger brother…he’s home from college for the summer.  He plays football for Rocky Mountain College in Montana…obviously he works out a lot…(because there isn’t a lot to do out there.)  For the last three years, he had been telling me that I need to start doing squats…(everyone used to joke about how I had a “thutt,” which is where there is no definitive difference between your thigh and your butt…it sucked…I was actually called “Little Booty”…also sucks).  So, I gave in one day and went to the gym with him.  Oh my gawd, it was so freaking hard.  My legs felt broken for a week…it was like death by squat rack.  It took me a couple months to try and get back into the whole squatting thing.

My second time getting back into squatting, I decided to squat without the racks or weights.  In fact, I was doing it in the laziest way possible.  I would be sitting in front of the tv…binge watching Netflix…feeling super lazy, but slightly motivated.  You know, when you’re thinking, “there is something I could be doing right now, I just don’t know what.”  So, I started standing up and doing squats while I was binge watching tv.  I would do sets of ten sumo squats, narrow base squats and pistol squats about ten different times throughout the day.  Then, by the end of each day, I had done hundreds of squats without ever feeling like I was working out.  I find myself doing squats all the time now.

What’s up guys this is @erichann71…(Follow me on Instagram)…with tips for leg day. Anybody that says cooking is the key to a man’s heart…is wrong, it’s squats. I don’t have many things I look for in a woman…pretty much all I want is her ass to be so fat that it claps when she runs.  To an (offensive lineman) squats are love, squats are life.  As much as leg day sucks it’s a nessecary evil.  (If you skip leg day you’re gonna look like the “weeble and wobble, but they don’t fall down” action figures and it’s not the best look). I found that getting through leg day is tough because, yes, squats are hard, but with the right pre-workout ALL OF THE THINGS are possible. No seriously, I take one and a half scoops of Mr. Hyde pre-workout and I feel like I went straight to Super Sayain 4.

Here is how I tackle leg day:

1) Get to the gym and take your Hyde when you get there (if you take it before you drive you might just go Fast and Furious behind the wheel).

2) Walk on the treadmill or bike until you feel the Hyde hit you.

3) Then make sure you warm up properly, take your time and increase your weight slowly.

4) Get HYPED before your set. (Put on some certified bangers… I put on The hardstyle remix of Unicorn Zombie Apocolypse, but to each their own).

5) If you’re hurting bad, just know that after the pain of the third set…you’re in the clear…it can’t hurt much worse than that.

Unlike my lazy sister…I use more advanced methods of squatting. My sister is about 5’7′ and 110 lbs where as I am 6’3 and 280 lbs.  Although the weights will vary, the method and end goal remain the same, to become Quadzillas wielding BUNS OF STEEL! If you are just starting out and you see a Behemoth squatting 500 lbs that may be me, but do not despair as we all started somewhere. I remember the days where squatting the bar was a set and my max was 135 lbs so trust me I know you may be discouraged because I felt disheartened when I saw my first Behemoth. That was when I started making the effort to be that “sidewalk cracking motherf$#er” as CT Fletcher would say. This will be a good way to upstage CT:

1. Firstly figure out what your max is and how much weight you can do for 1 rep. My one rep max is 460 lbs so, I take the percentage of that and round it to figure out my weights.

2. Back Squat: 5×5 at 75% of your max squat weight (the first number is the number of sets and the second number is the number of reps per set)

3. Front squat: 4×3 at 50% of your max (This will feel very, very hard, trust me… you will live)

4. Body Weight circuit: 3×50 regular squats, 3×50 sumo squats, 3×25 jump squats (yes you will be tired… yes it sucks… just remember BUNS OF STEEL!!!)

This should take about an hour and if you need to tailor this outline to your ability then by all means do what you can. Please don’t try to ego lift and do more that you can otherwise you’ll just look like a baby giraffe. I’m going to take my sister to go do a workout and I will make it challenging but she won’t be fighting to survive…I hope.

…BeccaJay here to sign off.  (P.s. follow my Instagram @DIYBeccaJay).  This post will be updated with pictures of Eric correctly doing the exercises…(because I’m too much of a spaz and I would rather not share bad habits with all of you)…after a work out at Gold’s Gym Simi Valley…aka the most amazing gym I’ve ever been to…the cardio room is literally a movie theater.  Wish me luck building my summer time booty, as I wish you all the luck in getting “suns out buns out” ready.

With love,

BeccaJay

Decorating: How to reuse X-mas/holiday lights

Hey guys, T.G.I.F.!  I’m glad this hectic week is almost over.  Luckily, I did a little crafting today to brighten up my apartment on this gloomy LA day.  I decided to take all of the Christmas-ish lights in my apartment and give them a make over.  (I’m like kind of really obsessed with Christmas lights, I think it comes from my mom.)  My mom sent me heart lights almost every year that I was in college.  So, I saved them all and decided to use them to decorate today, I call it: Peace and Love lamps.  I’m also going to use copper wire lights to make birds on a wire.  (The birds on a wire are paper clips I found at Target, but you can also find them on Etsy.)

Let’s start with the Peace and Love Lamps.  I gathered all of my materials together: vases and lights.  (You don’t have to use a vase, you could use anything you have, or find a way to attach your lights to the outside of a bottle or around your television.)  For the purpose of this blog, I suggest using a vase.  (Mostly because my boyfriend regularly gets me or sends me flowers, and I was running out of storage space for the unused vases…and I hate to throw things away.)

   
 Then, I put the lights in the vase and connected them to make Peace and Love Lamps as cute decorative lamps for my apartment.


Now, onto the birds on a wire.  I like this idea (mostly because I can use it to hang pictures without using tape/glue/frames.)  When I was in college I used to have them up on actual Christmas lights, now I’m going to use copper wire lights.  Right now, I’m going to use pictures of my boyfriend and I, but in a couple of weeks I’m going to replace them with pictures from my road trip across country and my boyfriend’s road trip across country.  I’m really looking forward to it.  (Hopefully he will co-write it with me <3.)

For now, I’m going to attach the bird on a wire paper clips onto the wire and then clip in my pictures.  Here are the before and after pictures.


This is how I used the lights I already had to give my apartment a new feel.  How will you use lights to decorate your place?  Lamps?  As a place to hang pictures?  Whatever you chose, I wish you all the luck in doing it yourself.  Stay tuned for Traveling: How to cross-country road trip and Decorating: How to decorate when you co-habitate, (I don’t know if that’s a real word or if it’s spelled right).  Anyway, that’s it for me today.  Happy DIY Friday!

With Love,

BeccaJay

Getting sick: How to stop your illness in its tracks

As anyone with a job can agree, your sick days are supposed to be used to do fun stuff.  Most of us would rather go to work ill than end up missing out on a trip, event, etc.  (I will admit it, I’m one of those people.)  I will also admit that no one should go to work sick…because you will actually make other people sick.  (I’m pretty sure I’m ill because I’ve been around ill people.) Another thing I should mention is that I love my job.  As rare as that is, I really do love my job, modeling has been amazing, great pay, hours and people.  For the first time as a post-graduate, I am happy with where I’m at in life.  I would never want the people I work with to think I’m ditching work, unreliable, or unprofessional by canceling with late notice.  (I guess I should explain why I would think the people I work with would even think that.)

Before modeling, I worked as a background actress for a couple months, and I had a calling service that was not understanding of illness.  If you were sick, you also had to pay for a medical examination from the doctor or else you would be put on probation.  It was awful.  I had to pay for two separate medical visits because of the flu and the stomach flu.  I knew what was wrong and I knew there was no medicine to fix it, but I was forced to spend money to prove it.  (And I have to say, working background five days a week can be brutal, not only the hours, but also because of the way you are treated.)  So, I guess now I have this irrational fear of missing work when I’m sick.  Anyways, whether you are trying to get over an illness because you want to go to work or because you’re saving your sick days to live a life outside of work, here are my experiences and some tips on how to get yourself feeling better ASAP.

Last week, I started to feel extremely ill, (you know, fatigued, hot and cold…all that really terrible/uncomfortable stuff.)   I was miserable, but then my sister came over and brought me some Sudafed day time medicine.  It was LIFE CHANGING.  I used to be a Mucinex kind of person, but man…Sudafed is the business.  Literally, I went from feeling like I was dying to being human again.  It was a blessing, I was able to tan, get coffee and shop with my sister without feeling terrible.  When I came home that night I slept ten hours straight, and by the time I woke up I felt completely fine.

I’m thinking, great, I’m cured.  LOL!  I woke up this morning feeling like death reincarnated.  (It’s pretty awful.)  Honestly though, it seems like everyone is getting sick with whatever this virus is floating around.  I would suggest Airborne or Emergen-C, but I think that they’re a hoax.  If you want your immune system to get better, then you need to work out and eat right, maybe take vitamins if your diet is lacking them, and I suggest making sure that you get FDA regulated vitamins, (there are a lot of fake ones out there, don’t be fooled.)

Sadly, there aren’t any vitamins to help you get rid of a cough.  Something even more sad, I’m at the point where I’m not sure if I’m coughing or quacking or barking.  (My neighbors probably think I have a new pet.)  So, I’m going to do something that actually works to help eliminate your cough.  It is this magic potion of warm/hot water and salt.  I swear by it.  Do this when you wake up and before you go to sleep at the very least.  It will help get you past the worst of it.

1. Get yourself a cup of warm/hot water.

2. Add in 2 tablespoons of salt.

3. Mix it up.

4. Gargle for a minute.

5. Repeat.

This should really help your cough, but you might still feel achy, groggy, or fatigued.  (I have a few remedies to help you through this.)

1. Take a hot shower in the morning, and blow your nose out while you’re in the shower.

2.  Make yourself tea instead of coffee.  (I suggest green tea with honey and lemon, or anything from Teavana or the Republic of Tea.)

3.  Eat something full of protein and a carb.  (I pile peanut butter on a bagel.)

4.  Take whatever day time medicine that works for you.  (Make sure you eat before so the medicine doesn’t upset your stomach.)

Another remedy I learned from my best friend from college/roommate’s step-father, was to boil water on the stove in a big pasta pot, then take it off and put it on the table.  While it’s steaming, you have to put your head over it and cover the back of your head with a towel so that it creates a steam room effect.  After you’ve had enough, you take off the towel, blow your nose and repeat.  (I suggest this if you’re not feeling up to a shower.)

By now you should feel better, I know I am, just in time to get to my next booking.  So, that’s it for me today.  I’ll check back in with new updates as I work on more home remedies to keep me going this week.  This is how I stopped my illness in its tracks, how do or will you stop yours?  I hope that these DIY home remedies are helpful to you if you’re feeling ill.  I wish you all the luck in feeling better and doing it yourself.

With love,

BeccaJay

Editing: How to edit your images

As I’ve shared before, I still have an iPhone4s (lame…I know…but at least I have panoramic…right?)  So, pretty much, my picture quality is D-list at best.  Every time I see something beautiful I whip out my handy dandy 4s, look on the screen and realize that the screen looks nothing like what I’m looking at.  (It’s the worst.)  The issue with using my upgrade is that I often break cell phones, so I’m waiting for another version before I upgrade so that I have a somewhat “life proof” cell phone instead of having one of the lifeproof cases.  I have to say those cases are great, unless you lose the little piece for the headphone hole, then it’s over and the phone is no longer protected.  (I would also like to say that in my experience, if your phone is wet, turn it off and leave it in a bag of uncooked rice for at least a day…shout out to the rice trick…you the real MVP.)

A little off topic there, back to photo editing to enhance picture quality because my 4s is struggling.  So, I downloaded a lot of editing apps and tried them.  I have a list of the ones that I like the most and a list of the ones that were outrageous, but funny.

My favorites:

1. Afterlight

2. Picstich

3. Instagram

You have to see it to believe it:

1. Spring (it makes you look taller and thinner)

2. Selfie (you can make your lips bigger, boobs bigger…you get the picture)

3. Lean Booth (you can make your boobs and butt bigger while shrinking your waist)

For editing tips and a good laugh, I will now demonstrate how to use a couple of these apps.

Download the app:

Select a picture:


I selected a picture I took at The Bacara Resort and Spa while on my anniversary trip with my boyfriend.
Where to start?

1. Clarify the picture.

2. Add some contrast.

3. Only saturate landscape pictures (otherwise people tend to look like Oompa Loompas.)

4. Adjust the picture so that it is as straight and/or semetrical as possible.

5. Crop out anything distracting if possible.

6. Add a filter if necessary, but at this point, you probably don’t need one.


Now my 4s picture quality doesn’t matter, neither does my lack of photoshop skills.

Here is my leanbooth before and after picture. (I had to delete the app to make space for more pictures, but you can find it in the App Store.)


I suggest avoiding the second list of apps as regular means of editing. Better quality pictures is different from altering the way you really look. Do your best to feel good about yourself and what you’re doing, rather than wasting your time trying to impress people. (I suggest using these apps if you are an actress or model who has gone through weight loss, but you don’t have new headshots.)

Anyway, follow me on Instagram at @DIYBECCAJAY for info on future posts.  This is how I do it myself, how will you edit your pictures?  Coming soon: DIY make your own MEMEs. I wish you all the luck in going out and going out and doing it yourself.

With love,

BeccaJay
Gardening: How to save your dying succulents

Recently I started modeling, I work about four to five days a week, but the issue is that I mostly work nights, about 6:30pm to 10:00pm.  For anyone who works late, you probably know the struggle, should I just sleep in for the first half of the day?  Trust me, it was great at first, but I was over sleeping until I was over tired.  That was another issue, but I live with my boyfriend who works a 9-5, so he wakes up before 8am on weekdays.  I decided that I was going to start waking up with him and trying to accomplish as much as possible before I have to go to work at 6.  I went through StumbleUpon and Pinterest trying to find little projects to occupy my time, (because what I really wanted was a puppy, but my boyfriend is allergic to dogs.)  That is when I discovered gardening (well actually I used to help my mom garden when I was little, but the projects looked so cute online and I really wanted something to take care of).

So, I started growing my own succulent garden after reading an article about air purifying plants that were really hard to kill.  I picked up some Aloe Vera and Jade, mostly because they were the most cost efficient plants I could find at Home Depot.  (I really wanted these cute mini palm trees, but they wouldn’t really fit on my fire escape garden.  Sucks.)  Anyways, I got the air purifying plants and these really cute flower looking succulents.  Then, I grabbed the appropriate soil, pots and tools.  (Don’t forget to get rocks to add to the bottom of the pot before the soil…its part of the reason I’m writing this post…whoops.)  All in all, it cost about $40 to start my succulent garden.

Below are pictures of the OG garden:


Then, I told my mom about the garden and she decided to give me clippings of some of her plants as well.  So, two pots grew to four pots.  A couple days later, I was walking along a side street of Melrose, and I spotted a beautiful flowering purple plant that had broken off onto the sidewalk. (I took it because it was pretty.)  I went home, and I made a home for it in my garden.  (I should mention that I have a tendency to keep things I find on the ground, its been a habit since I was a child…confetti…rocks…hoarding tendencies…it’s fine.)

The picture below depicts my blooming, happy little plants before I overwatered them all (the second reason I’m writing this blog):

Today, I am going to attempt to remove the plants that are definitely goners, and try to save the survivors.  I haven’t been giving them much water, (it’s like survival of the fittest: California drought edition) and a couple have some how come back to life, so I’m calling them The Walking Dead (I’m obsessed with the show, if you haven’t seen it, go watch!).

Sadly, the Aloe Vera (which I think was dead when I got it) and my pretty sidewalk flower aren’t going to make it, but my grandma gave me a couple of her cacti from her backyard and I’m going to use them to fill the void:


Things I’ve learned:

1. You need to have a pot with a hole in the bottom.

2. You need fast drying soil.

3. You most definitely need rocks.

4. These plants are not animals, you do not need to feed them daily.

5. Make sure they have direct sunlight.

Here is a picture of the final project:

Obviously, I’m going to need to update my iPhone4 camera for all of your sakes and mine.  Hopefully, you will see a change in picture quality in the next couple weeks, along with updates on my “revamped” fire-escape garden.  (I plan on blogging about how to these to make these into the perfect gift as well).  This is how I made my own succulent garden (and how I’m trying to keep it alive), how will you make yours?  Feel free to put together a little garden for your Mom, Grandma, Aunt, etc for Mother’s Day this Sunday.  I wish you all the luck in going out and trying to do it yourself!

With love,

BeccaJay

Eating: How to change your habits

When I started acting, I used to joke, “I’m only here for the food.”  The crafty, aka craft services, would set up catered breakfasts, lunches and snack tables. I couldn’t stop myself from grabbing chips, candy and soda. I mean come on, it was like a childhood dream come true all the junk you can eat.  While working, I wasn’t exherting much energy, yet I found myself sluggish and tired most of the time.

Now, I guess I have to aknowledged the fact that every set had healthy options.  They provided fruit, vegetables, nuts, and salads that I avoided for the first couple years that I worked background.  Part of me thought, well no one really ever sees me so what does it matter if I have an apple or three bags of chips.  Boy, was I wrong.

One day, my boyfriend and I were looking for something to watch.  He suggested watching something I was in and trying to find me in the background.  We found my episode of 90210, where I played a beach goer at a surf contest. There I was, on his big screen, and I hated how I looked.  I understood the phrase, “the camera adds ten pounds.”

I was an athlete most of my life, but I had lost all muscle definition and let myself get out of shape.  I realized that what I was eating made a difference in how I looked and how I felt about myself.

Questions to ask yourself:

1. Will I still want this after drinking a cup of water?

2. Is there protein in what I’m eating?

3. Have I had any fruits or veggies today?

4. Would I feel better if I ate this or if I ate that?

Obviously there are days where I’m going to eat an entire pizza or a pint of ice cream, because it’s delicious. I just don’t do it regularly.

How to make it taste better:

1. Quinoa: cook it on the skillet til it’s golden brown then boil it in chicken broth instead of water.  Then add fresh tomato and spinach.

2. A power green salad (spinach, kale, chard and mizuna): try adding berries and turkey bacon with balsamic vinaigrette.

3. Chia seeds: add them to your next acai bowl, or first acai bowl if you’ve never had one. I suggest the Green Grotto Juicebar in downtown Los Angeles.

Even though it was a struggle at first, I’ve started to get a hang of eating better.  Instead of chips, candy and soda, I have an apple, almonds and carrot sticks. I started walking to get my fresh produce, my morning coffees, and take-out.  In two months I lost ten pounds and my body is finally tone again.  I will post about my work outs and lifestyle changes that helped me get results very soon.  This is just the first post of many about my new found addiction: healthy, clean(er) eating.  No more fad diets for me. This is how I changed my eating habits, how will you change yours? I wish you all the luck in doing it yourself.

With love, 

BeccaJay

Acting: How to get started

It all started four years ago, with a little help from a friend.  Picture this, I was in my second year of college, had to give up my dreams of business school…(because I’m one of the reasons that Math For Dummies exists)…(and maybe because I failed calc)…so, then I was a Communications major who sucked at math, who thought she wanted to be a journalist, run a magazine or host a television show…you get the picture.  I was lost.  I had no idea what I was doing or what I wanted to do.

So, summer rolled around and a bunch of my friends had internships lined up and they were posting status’ about how excited they were and hundreds of people were liking them.  I have to admit, I was jealous of their ability to pick something, one thing that they wanted to do that summer and do it.  There I was, not the slightest idea where to go or what to do.  So somehow, I wound up on Craigslist.  Not my brightest moment, but I was determined to do it myself.  As I searched, I came across this PR job.  It seemed super legitimate, good pay, the ability to make more than minimum wage, and at the interview everyone seemed normal.  As they explained at the interview, the job was pretty much memorizing a script then going out into the community to recruit kids to come to our event.  I had been asked since I was a child, if I wanted to act or model.  My parents were very much against it, there was no discussion, my education was to come first.  They believed that the offers were a hoax, they weren’t willing to pay for head shots or acting classes.

At the time, it all made sense to me.  If my parents weren’t going to let me do it as a child, then I would do it as an adult.  So, when the job was offered to me I took it.  I made friends with a couple of girls, who I am still in contact with today, and gave it about two months.  I end up sucking at the job because I believed what I was selling was a lie.  My parents were right, some of the places are fakes, but I wouldn’t have learned that lesson if I wasn’t trying to do it myself.  I didn’t let that summer go to waste, I quit and started looking for something new.

My friend from work told me that she was going to sign up for this place called Central Casting, located in Burbank, CA.  She told me that it was free and I decided to give it a try.  In retrospect, it was one of the best decisions I made as an undergrad.

Reasons Why Central Casting should be your first stop:

1. Once you sign up, you are registered for 3 YEARS.

2. It’s free.

3. You only work when you want to work.

4. Occasionally they call and offer you jobs.

Things you should know before hand:

1. You can not ever be late, not even a minute.

2. You will get lost at some point, always give yourself an extra 30-45 minutes.

3. It will be difficult to get through on the phone lines.

4. Pictures of you in cop costumes, scrubs and period style outfits will help get you booked as those roles.

5. It pays minimum wage, but most days hit overtime.

In my first three years at Central Casting I worked a total of six jobs.  I worked on the last season of Californication and 90210, as well as the first season of The Mindy Project.  (When I say worked on, I mean I am in the background, no more than an unfocused body or face filling space while the real actors give their dialogue.)  After I graduated, I got what is called a calling service, they’re essentially your agent, but you pay them a flat fee per month, not fees based on the income from the job.  This way you never have to worry about getting through to the casting directors yourself.  The company I selected was Extras! Management, which is located across the street from Central Casting, mainly because I had a $20 off coupon.  I personally had a bad experience.  I would have appreciated more compassion, understanding, or humanity from a few of the employees that I regularly had to interact with, but in all honesty, they did get me some really cool jobs, at first they booked me jobs about five days a week, and some of the employees were very nice.

If you need acting head shots or photographs of yourself, I suggest using Model Mayhem and doing some TFP (trade for print) so that you don’t have to pay for the pictures. If you do want to spend money on edited head shots I suggest using Thumbtack, which will help match you to the photographers that best fit your needs and preferences.

TFP with a friend named Caleb:

  
Professional Head Shots:

(Featured Photo)

Other calling service options:

1. Jessica’s A-List (never heard a single complaint about her services)

2. Joey’s List (you can only use this service if you sign up for Central Casting and are in good standing with them)

Other casting networks:

1. LA Casting (Small Fee)

2. Model Mayhem (Free)

In the last year, I worked on over 75 different television shows, movies and commercials.  I networked with other background actors and actress as well as crew on all of the sets I’ve ever worked on.  Building your network means more jobs in the future. For example, my friend, that I met on set, and I wanted to join SAG, (which I will hopefully be able to afford by the end of this year), so she wrote and directed an independent film and cast me as one of the leads.  It ended up being a pretty funny movie, thanks her writing talent.  I’ll save the rest of that story for a future blog post.

Anyway, if you ever had dreams of becoming an actor or an actress, but your parents wouldn’t let you or you just didn’t know how, I hope that you can use my experiences and advice to help get yourself started.  I wish you luck in going out and trying to do it yourself.

With love,

BeccaJay

Hello world!

Welcome to the DIYBeccaJay blog!  I’m a Los Angeles Native, UMass Amherst Alumni, Actress, Model and Production Assistant.  Since life doesn’t come with an instruction manual, I’ve decided to quite literally, do it myself.  I wanted to write this DIY blog, not just for arts, crafts and cooking, but also to share tips I’ve learned from my first year in the entertainment field.   For example, I will be sharing things like “How to put together your own succulent garden” as well as, “Acting: Tips to help you get started.”  Let the blogging begin.

Welcome to my DIY Life.